Get your website in $5 per month [Part 4]
Alright we are now in the last part of our budget website tutorial series. In the last part we have seen how to install and configure all the requirements for the website on your Digital Ocean Droplet. Now in this part we will see how to create a database and install WordPress on your brand new Droplet.
Create Web Domain
Now, the first thing we need to do is create a web domain in Vesta. Creating a web domain in Vesta will automatically create all the Nginx configurations and webroot folders where we will be hosting our budget website. To create a web domain, login to your Vesta Control Panel and then click on the “Web” option on the top. In the Web section click on the Green plus symbol

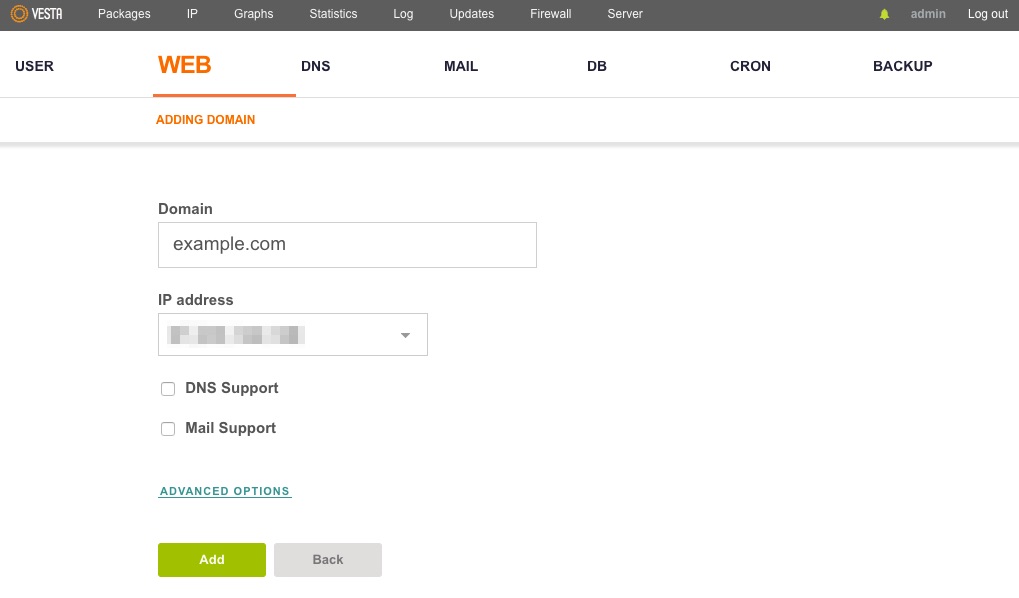
You will be now redirected to the domain adding page. On this page add your domain name and select the public IP address of your server from the dropdown if not already selected. You can uncheck the DNS Support since in our case the DNS is being taken care of by Freenom — our domain registrar. Optionally you can select Mail Support if you want a mail server enabled on this domain.
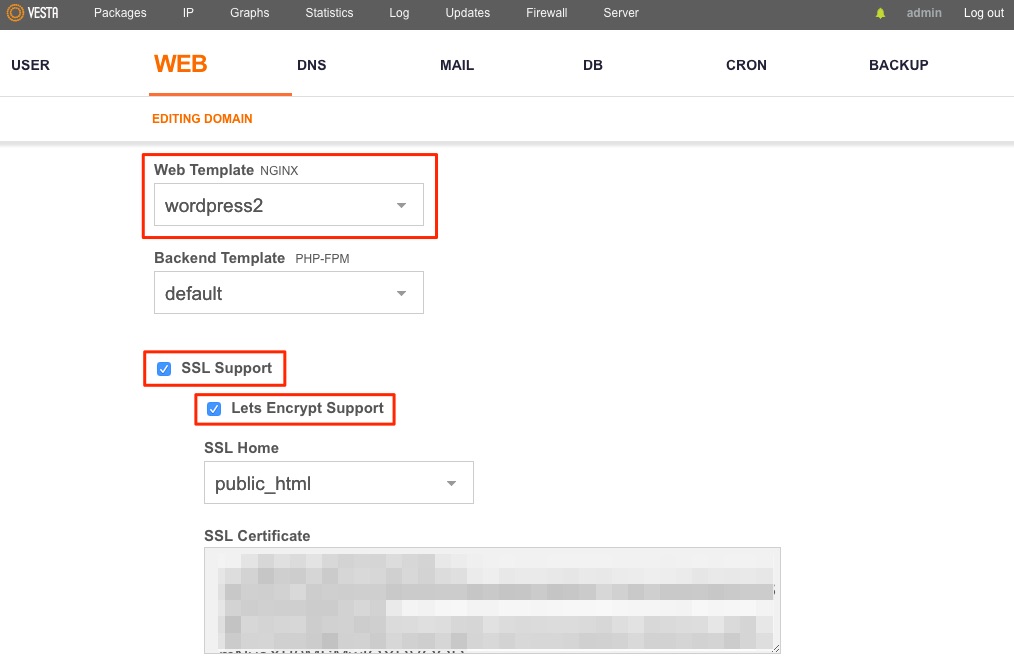
We need to do some minor configuration for WordPress. Once domain is created, click on edit on the domain list page. On the edit domain page scroll down to “Web Template” and select “wordpress2″ from the drop-down.
[BONUS] You can optionally check the “SSL Support” and select “Lets Encrypt Support”. This will add an SSL certificate with https support to your budget website with Green Secure lock. The SSL certificate is issued by Let’s Encrypt and its FREE!
Once done hit save and your web folder and configuration is ready.
Create Database
Now lets create the database. WordPress requires a MySQL database to store all the content, data, settings etc. Creating a database is similar to creating a web domain. Click on the “DB” option on the top and then click on the Green plus site to create a new database.

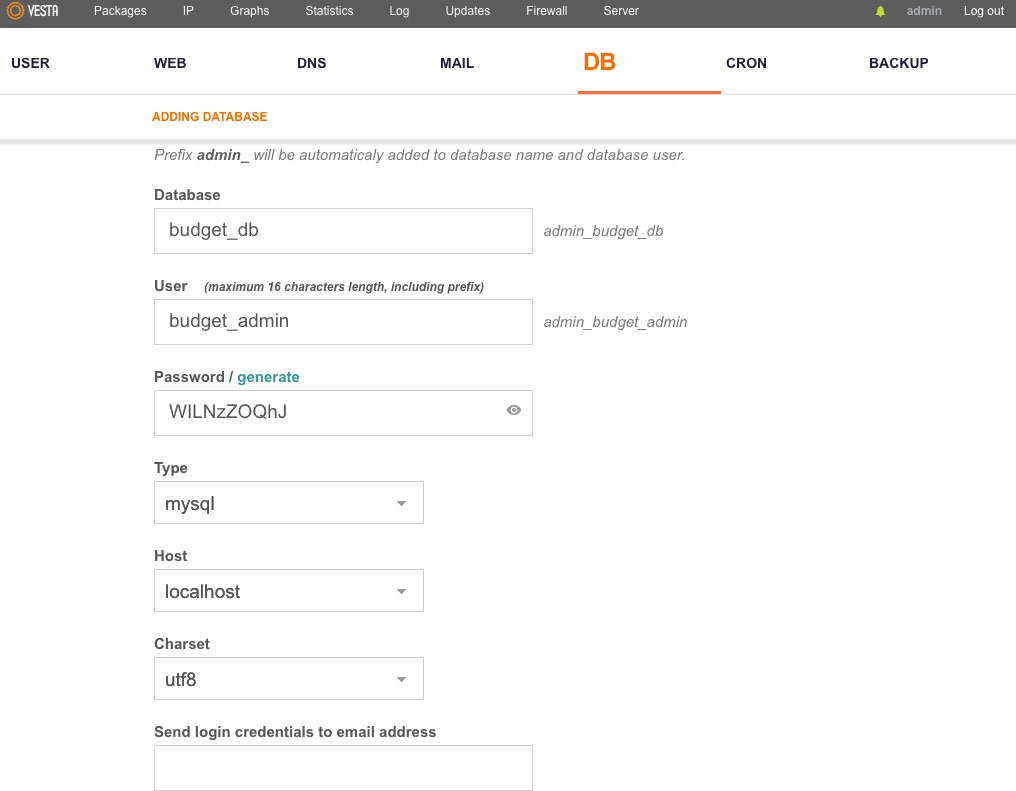
On the Add Database page enter the database name and the username and password for the database user. You can leave all the other options as it is. Note, Vesta will automatically add the prefix admin_ to your database name and database user. Vesta installs phpMyAdmin as well by default. You can access phpMyAdmin from http://yourdomain.com/phpmyadmin. Note down all the details that you have used to create the database as we will need this to install WordPress for your budget website.
Installing WordPress
We are all done now. We are ready to install WordPress and get our budget website on the wheels. To install WordPress login to the server using SSH with the Vesta username and password and go to the web root folder.
Once connected to the server you will land on the home folder of the Vesta user. All the web root folder are available in the /web directory. For instance if your Vesta username is admin and your domain name is example.com then your web root folder will be
/home/admin/web/example.com
Go to your web root folder. Here you will notice a few folders already created. The main folder where your website files will reside will be the public_html folder. Go to the public html folder and use the following command to download WordPress files.
$ wget https://wordpress.org/latest.zip && unzip latest.zip && mv wordpress/* . && rm -rf latest.zip wordpress
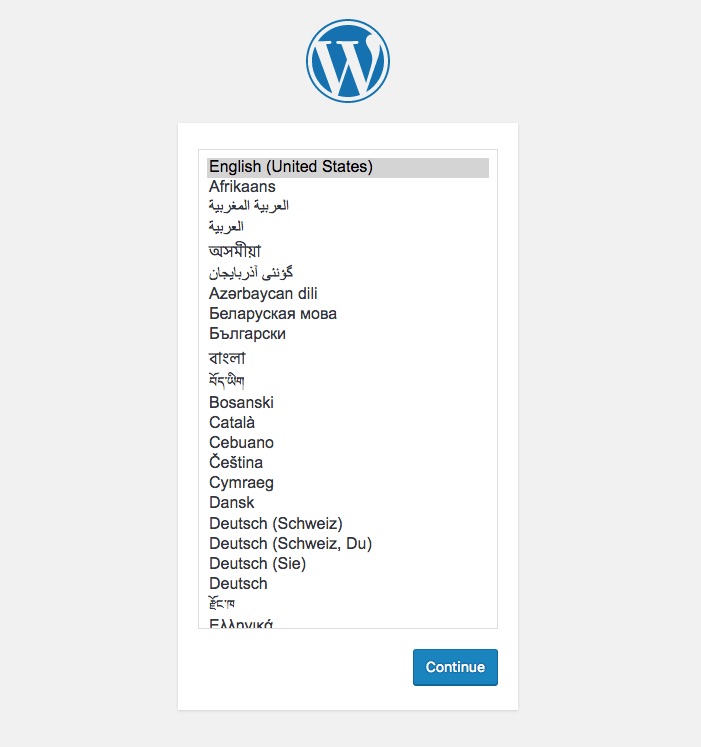
Now go to your browser and visit your domain. You will be presented with the WordPress installation screen. The first step will be to select your language. Select your preferred language and click on Continue.
On the next screen click on Let’s go! — Make sure you have all the Database details ready at this point.
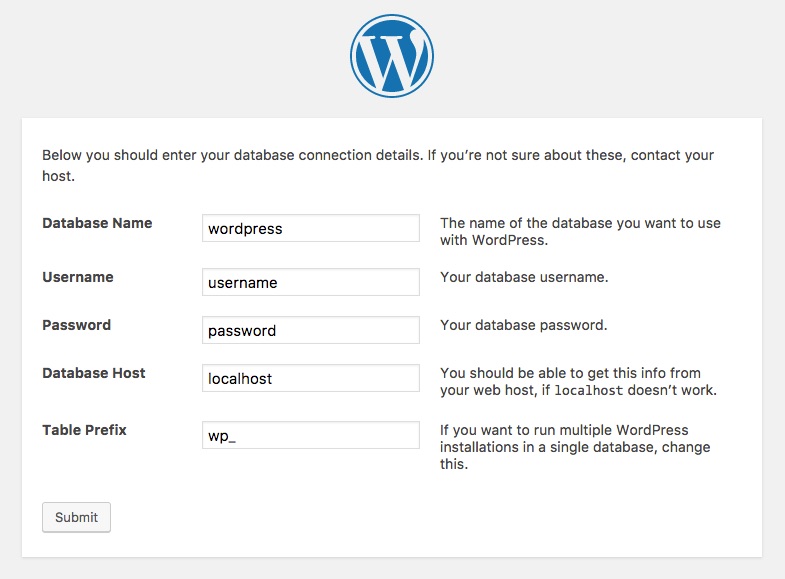
In the next step enter your database information which we created earlier. WordPress will check all the details and if all the details are correct it will ask you to Run the install
Level: Intermediate
Technologies: Linux / Unix, Git
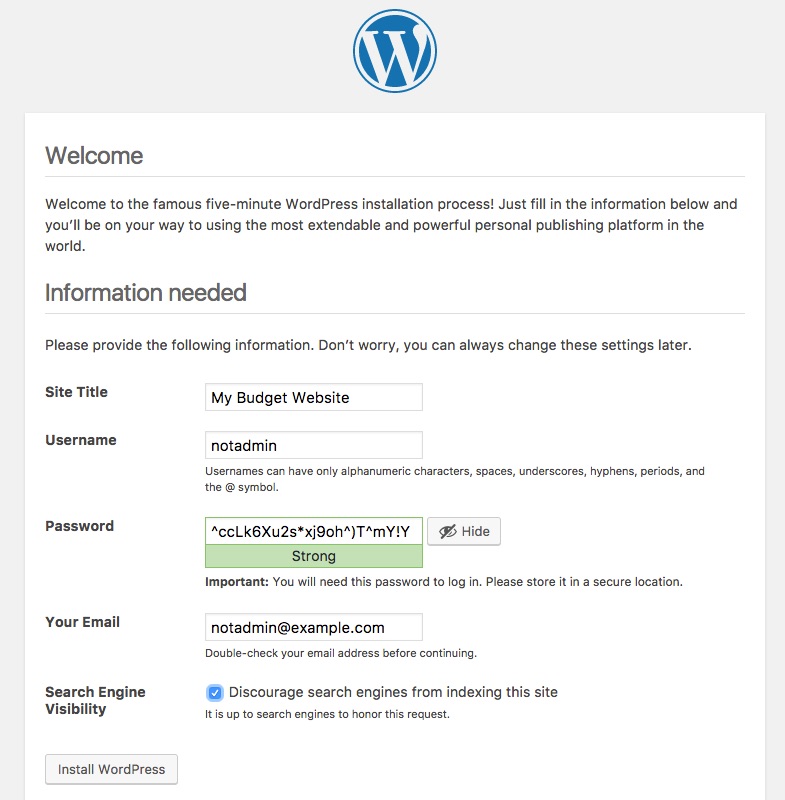
After WordPress has finished its installation it will ask you for your budget website details and admin user details. These admin details will be used to access your WordPress Dashboard.
As a security precaution never use common words such as admin or administrator for the WordPress admin username. Also, make sure to use a strong and secured password.
That’s All Folks! You have now successfully setup your budget website now. You can login to your WordPress Dashboard on http://yourdomain.com/wp-admin — where yourdomain.com is the domain name that you have installed WordPress on.
You can now go ahead and install some theme, plugins and create pages for your website now.
Stay tuned for some more advanced articles for WordPress, DevOps and much more.
