Get your website in $5 per month [Part 2]
In the previous part of our Budget Website Series we have seen how to get you on the internet and what are the prerequisites of the same. This part of the series assumes that you have already registered for your domain name and signed up in Digital Ocean. In this part we will see how to create a new Droplet (VPS) on Digital Ocean and how to connect your domain name. So, lets get started.
Creating a Droplet
Droplet is a computing component in Digital Ocean. This is nothing but the actual cloud server. Droplets are resizable, which means that you have the flexibility to resize server parameters such as Hard Disk Space, Memory and so on without rebuilding the whole server. Of-course your billing will change based on what configuration you are selecting.
To create a new Droplet login to your Digital Ocean account and click on Create Droplet button on the header.

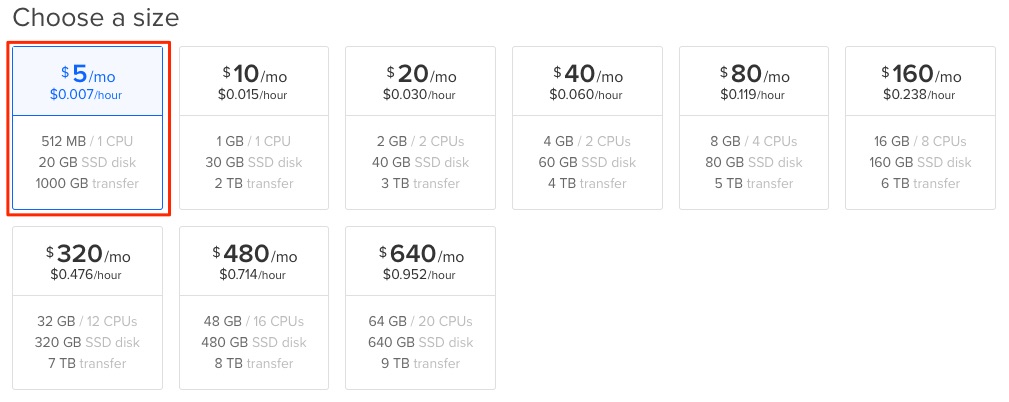
Now, you will be redirected to a page where there are a bunch of options available. There are 3 main options which you need to select carefully. These options are; Image or the Operating System of your server, Size — this is the physical configuration of the server and it will determine your billing as well, and the Datacenter Region this is the geographic location where your Droplet will be created.
For the Image option we will select “Ubuntu 16.04.2 x64”.

Then we will choose the size as $5/mo option since we are creating a budget website.
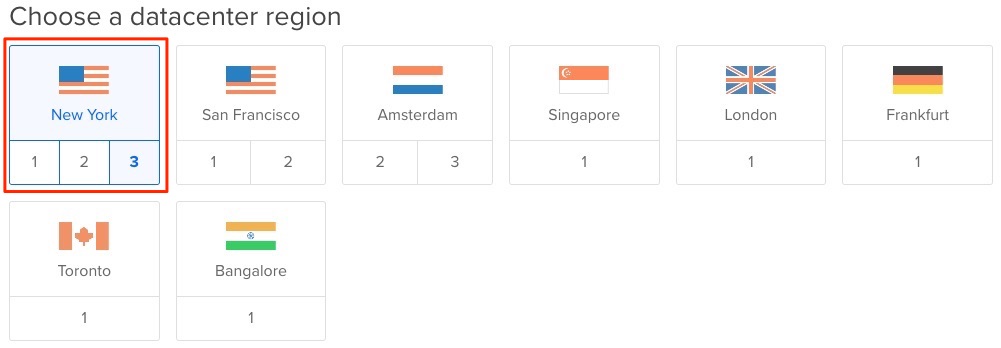
The Datacenter Region should ideally be the closest location, considering from where your maximum traffic is going to come from. For the sake of simplicity, we will select the default location New York 3.
Optionally you can give a hostname to your server for easy identification

You can leave all the other options as it is. Hit the Create button once you are through, and your Droplet will be created.
Accessing your Droplet
Once the Droplet is created you will receive an email from Digital Ocean with the details to your Droplet and credentials to access the same.
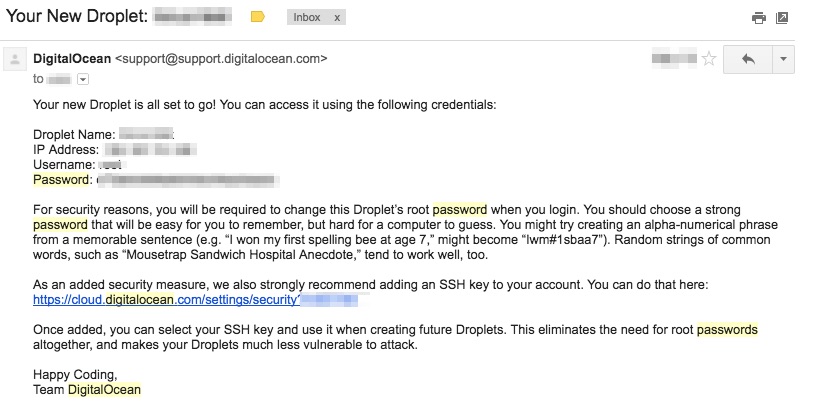
A public IP address will be assigned to the Droplet, which we’ll be using to access the Droplet via SSH and point your domain name as well. The Droplet can be accessed via SSH using
$ ssh username@x.x.x.x
The username and x.x.x.x corresponds to your Droplet’s root username and public IP address. Both pieces of information are part of the credentials which you can find in Digital Ocean’s email.
After running the command you will be asked for your password. This is available in the email too. Once you login for the first time you will be asked to change the password for the root user. Please make sure that you set your new password which is strong, secure, and difficult to guess.
Point your Domain
You must have registered your free domain on www.dot.tk. Now its time to point your domain. Pointing your domain is nothing but letting the internet know that when somebody types for your domain name and tries to access the website it should go to your web server. So we will be pointing our server’s public IP address to our domain.
Dot.tk domains are managed by a registrar known as Freenom. Once you have registered your domain you can login to you Freenom Client Area and view all your domains.

For the first time you have to set the domains Nameservers to Freenom’s DNS. You can do this from your My Domains section by selecting Manage Domain on the domain that you want to point. Now click on Nameservers menu under Management Tools
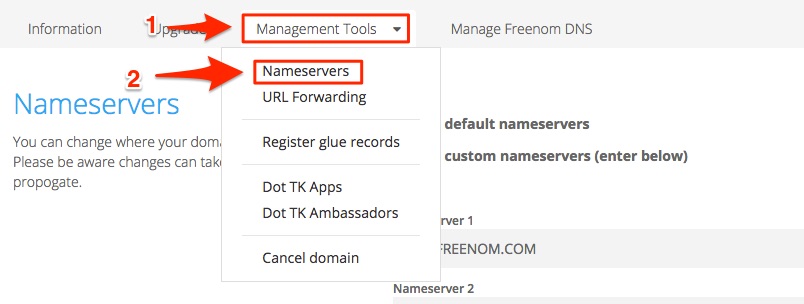
Once you are on the Nameservers page select the “Use default nameservers” option and click on “Change Nameservers”
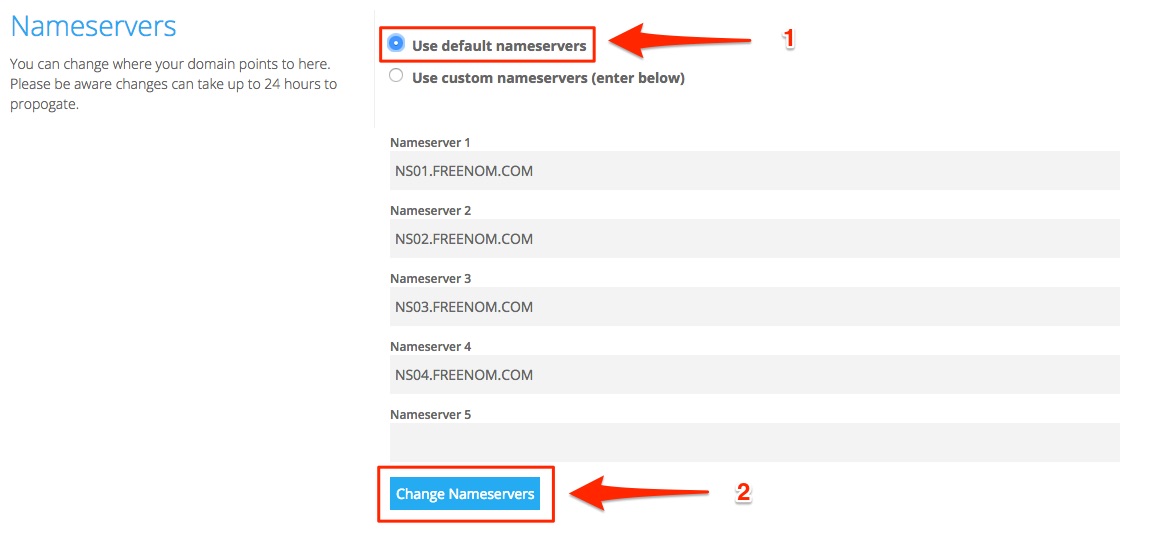
Once the default name servers are updated you should be able to see the Nameserver 1, Nameserver 2 etc., input boxes filled up with Freenom’s DNS address. Now you are ready to manage the DNS entries for your domain name.
After the DNS has been setup click on “Manage Freenom DNS” menu from the header. A new screen will show up with a table and some fields. Now here you will be adding 3 records as follows and then click on “Save Changes”
- Name: blank | Type: A | Target: Droplet’s Public IP address
- Name: * | Type: A | Target: Droplet’s Public IP address
- Name: www | Type: A | Target: Droplet’s Public IP address
That’s it. You have now told Freenom DNS that if someone requests for your domain name then it should send them to your Droplet’s IP address and there will be a website waiting for the visitor!
It may typically take anywhere between 12 – 24 hours for the DNS changes to take effect globally. This effect is called “domain propagation” You can check where all your domain has been pointed to your server on the globe from some ping services such as Just Ping.
In the next part of this series we will see how to configure a web server, database and the whole shebang for your budget website on your Digital Ocean Droplet. Your domain should also be propagated till the mean time.
Do drop in your queries, comments below and we will make sure to get back to you. Until next time!
